Showing posts with label guest post. Show all posts

Saturday, October 9, 2010

Guest Post: Becky (Strumpet's Crumpets) - Embroidered Book Illustration Tutorial

Hello Gang! I'm Becky from Strumpet's Crumpets! I was very stoked to help blog during Carol's move into her awesome new home!

So here goes, what's your favorite book? I have a list of favorites, but one that is most important - Hope for the Flowers! If you've ever read it you know it's amazing! The book has a very special place in my fellow and my life! So I thought why not embroider the illustration on the cover. It's hanging in our bedroom, so everyday we are reminded of that sweet story!


To begin I photocopied the cover, so I wouldn't mess up the actual book, then I got these supplies together:

1.hoop (paint if you paint your hoops - I always do)
2.fabric (paint again if you paint part of your fabric, I did)
3. embroidery thread
4. carbon paper
5. pencil


Instructions:
1. Take fabric and tape it down to a hard surface.
2. Take the carbon paper and tape it carbon side down on the fabric. Then tape your photocopied book cover on top of that! 3 layers; fabric on the bottom, carbon paper, top is the paper! You must tape because you don't want the layers to shift or it will be wrecked!
3. Grab a pencil and trace the illustration you want. Use a colored pencil so you see what you've traced.


4. Take the tape off each layer and put your fabric in the hoop (you can paint wooden hoops if you'd like, of course let them dry before placing the fabric in the hoop).


5. Start embroidering! :)
6. I use my hoop as a frame, so I hot glue the extra fabric to the back of the hoop!
7. Hang it up and enjoy!!


And tada!
So what's your favorite story or book? This is great for kid's rooms too! Dr. Seuss, fairy tales, fables, etc. I'd love to see your embroidered book illustrations! Stop by my blog and send me a link to your embroidery photos! I hope you all have an awesome day and lets all wish Carol and Seth happy moving and unpacking! :)

Friday, October 8, 2010

Guest Post: Meg (Twisted Tree) - Halloween Inspiration

Hello there That Is Charming readers!

My name is Meg, from the blog Twisted Tree where you can read the ramblings of my life as a stay at home mom to three perfect children and the wife to the most amazing man( at least I think so)!

Carol asked some of her blog friends to help her out with a guest post while she moved into her new adorable home, that I love by the way, so I jumped at the opportunity!

Since it's October, what better to talk about than Halloween!

I have to admit, I was never a fan of the holiday until I had children of my own and now I look forward to it every year...not to mention I have a husband who decorates more than anyone I know for Halloween, he's a dork, but that's why I love him!!

Do you still dress up for Halloween? Hey, it's one time a year when you can dress up as a bunny rabbit, princess or sock monkey and no one will look at you like you are crazy...so go for it!!

Here are some "spooky" images that I found to get everyone in the Halloween Spirit...


Trick or Treat!

Thank you Carol for letting me guest post on your awesome blog, I hope you get all settled into your new home and make it your own with all of your lovely creations and goodies! Home is definitely where the heart is!

xoxo~Meg

Thursday, October 7, 2010

Guest Post: Kyla (The Fiction We Live) - Autumn Patterned Fortune Cookie "Crackers" Tutorial

Hello everyone!

I’m Kyla also known as OneLateNight from The Fiction We Live. Carol is currently on the move to her new fantastic home!
While she is away she asked if I would do a quick post to give you all something to read while she is moving and unpacking. I decided to do a quick DIY for autumn.

During Autumn I have my very specific go to decor items; Pinecones, Leaves and Cinnamon Sticks. This time I thought I would show a really cute addition to your table, or family gathering. On Christmas specifically my family will open crackers before we eat, and wear the silly crowns and laugh at the ridiculous toys inside. This time why not grab some great scrapbooking paper and goodies from your craft room and throw together a really fun addition to any table.

Autumn Patterned Fortune Cookie "Crackers"


1) For Supplies you will need:
Preferred colors of paper
Scissors, or cutting tool
A perfect Circle to trace (I used 3 inches for the small cookies, and 5 inches for the large)
Glue or Glue Dots
Additional paper to make fortunes, or fun buttons

2) Cut up your paper into the amount of circles you would like to make into paper cookies


3) Follow the picture below to fold your cookies. Fold your circle in half without creating a crease; have the open end facing to your left. To begin the bending of the paper cookie place your thumb and middle finger on each end. While still holding the opening closed with the other hand place your pointer finger in the middle of the folded circle and start pinching with your thumb and middle finger.

As you start to “pinch” you will see the paper to all of the work and a paper cookie will form.


4) Once you have folded your cookie place a dab of glue, or a glue dot into the newly folded crease and hold your cookie together until dry. If you want to add in a paper fortune, buttons or charms do so before gluing.


5) Place a bunch in a bowl, or on individual plates for a fun dinner party addition. You can add in your own fortunes, Jokes, notes, charms, or even buttons. I think buttons would be a great after dinner game!
Place all of the same color buttons in each paper cookie. Place 2 different coloured buttons among the group. Those who open the cookies with the different coloured buttons are on Dish Duty! Easy as Pie


Thank you so much to Carol for letting me guest post to share this DIY!
Carol I wish you a happy and easy move and I’m sure I’m not alone in being excited about seeing pictures of your house when you’re all settled.


Happy Autumn everyone!
XO. Kyla

Wednesday, October 6, 2010

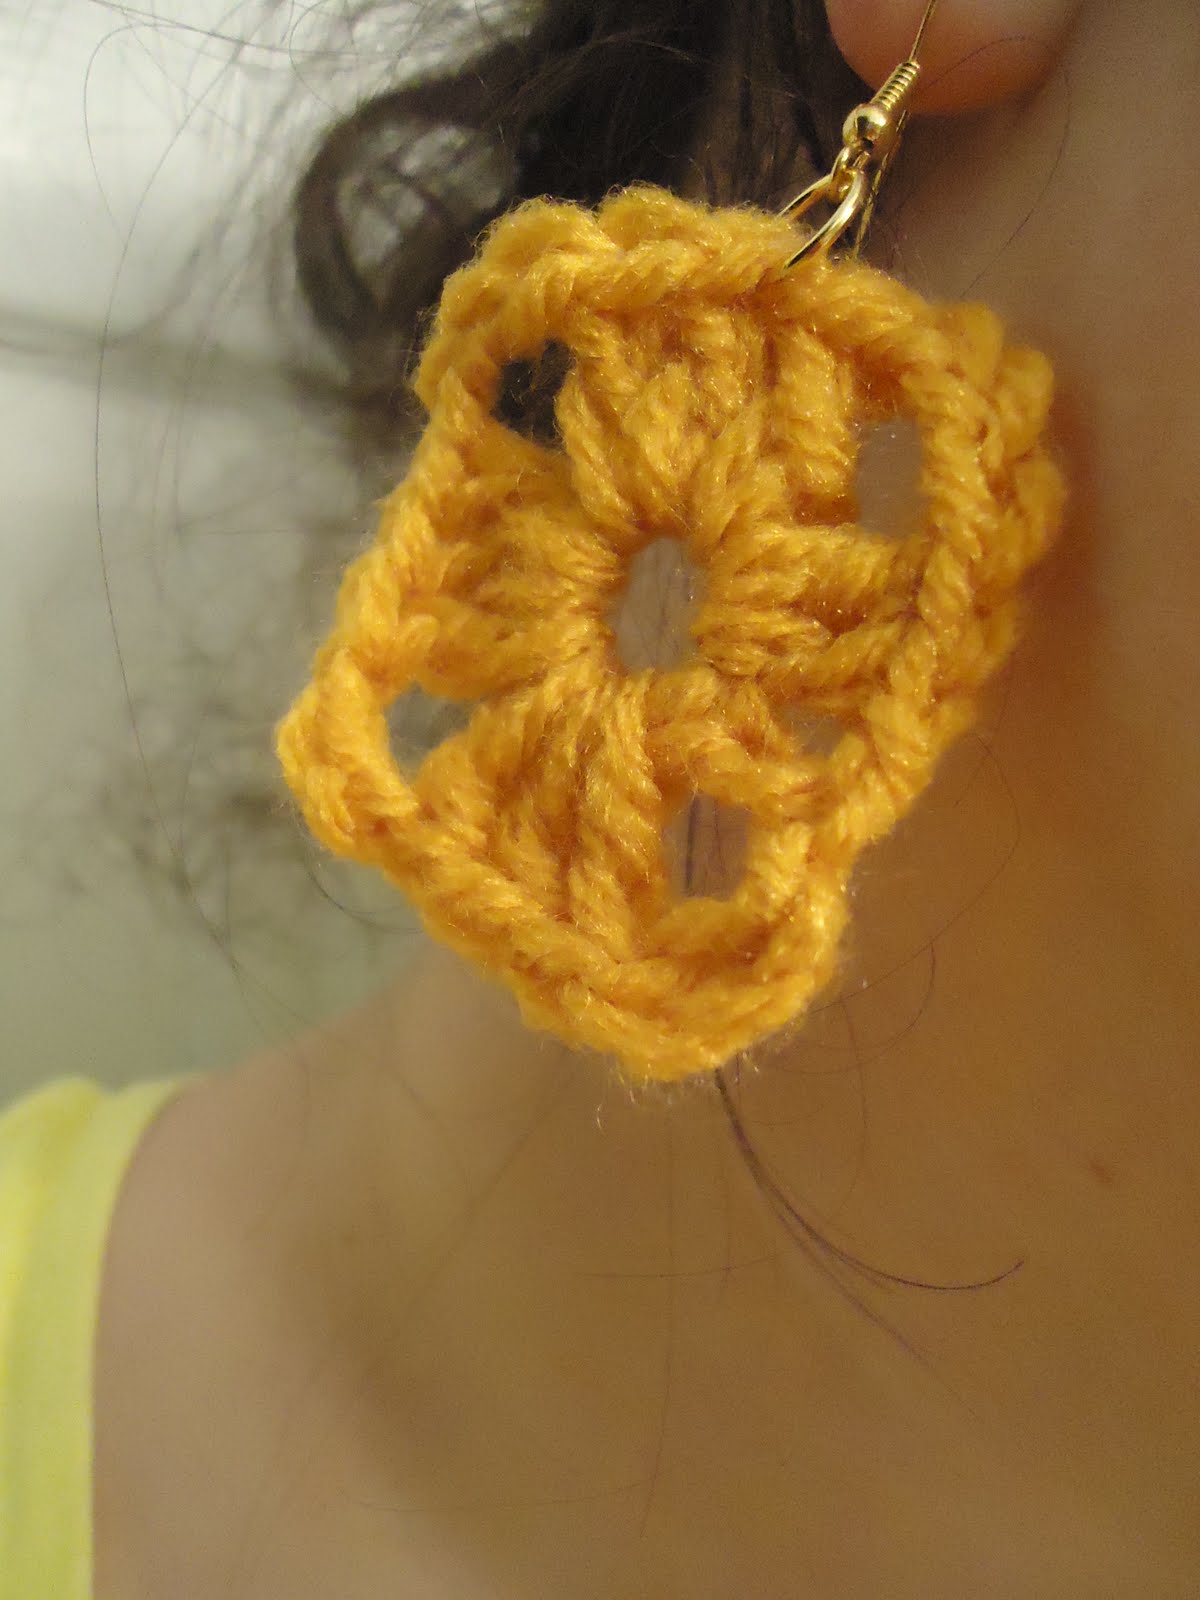
Guest Post: Ali (ali crochet) - Giveaway


Hello, I’m Ali from Ali Croshaye.com. First I want to thank Carol for having me be a guest poster on this gorgeous blog. I am very new to the blog world and I’m learning as I go. This is my first guest post/give away ever! I’m super excited! So here is goes! I have a beautiful handmade granny square earring that was crocheted.

To enter:
All you have to do is leave a comment on this post. Be sure to leave an email address so you can be contacted if you win!

The giveaway will end Saturday October 9, 2010. I will shortly contact the winner there after.


Happy Blogging and have a wonderful week! (:
Love, Ali
alicroshaye.com

Tuesday, October 5, 2010

Guest Post: Kam (Campfire Chic) - Felt Tissue Holder Tutorial

Hi! I'm Kam, aka Campfire Chic, and while Carol is busy moving I'm popping in with a little DIY. I like being able to make crafts in the time it takes to watch Modern Family. You can make a handful of these puppies during one episode! I hope you enjoy it :]

This craft is quick and easy. In fact, it is a perfect craft to do with kids (adult supervision is recommended) or as a last minute gift!

Felt Tissue Holder
Materials Needed:
  • Needle

  • Felt (I used Eco-felt, which is made from recycled plastic bottles, in green)

  • Embroidery Floss (I used DMC 420)

  • Travel pack of tissues

  • Scissors

  • Buttons/Badges/Pins whatever you want to call them! You know you have a few laying around looking for a home
    Cut Felt
    Sew Edges

    Tissue in Pack

    Decorate

    Other Ideas

    I am excited to see what you come up with!


Thank you, Carol, for allowing me to do this guest blog while you move into your new home :)

xo, Kam
P.S. If you have any questions, feel free to contact me (blog, twitter, e-mail, etsy)

Tuesday, September 7, 2010

Finger Knit Feather Headband Tutorial & Giveaway


Hello! I am Amber from A.Darling. Carol asked me to give you guys a little tutorial today! If you have never been to my blog before, you'll see that I am way into knitting and today I am going to show you one of my favorite things for the fall season, headbands! This headband is so cute and easy to make, you don't even have to know how to knit, awesome right?

supplies needed:
bulky yarn , feathers, buttons, tapestry needle, measureing tape
-------------------------------------------------------------------
directions:

I just wanted to make a little note that I did not measure around my head, I just kind of winged it until it fit, but you can measure around your head and finger knit the lenght of it, totally up to you!

To start, tie a loose knot at the end of your yarn and loop it around your pointer finger.


Start at your pointer finger and weave it in and out of your fingers until you get to your pinky.


Loop your yarn around the front of your pinky, and weave it back to your pointer.


Reapeat these two steps until you have two loops on each of your fingers


Here comes the fun part, take the bottom loop and pull it up and over the top loop on your fingers and let it slide to the back of your hand.


Now repeat the first two steps, weaving the yarn through your fingers until you have two loops, again pull the bottom loop over the top loop.


Now if you look at the back of your hand, it should look like this


And this is ok! Don't worry about it. As you go along, make sure to tug your headband every now and then to make it tight and even things out.

Keep repeating steps one and two until your headband is the length you want it to be


Be sure to loosen your loops around your fingers so you can slide them out easy.


Cut your yarn and leave about six inches of tail so you can thread it through the loops


If you have a big loop at the end like I did, just thread your yarn back through and tighten it up.

Now you are going to want to "try" on your headband so you can figure out where you want to sew your button onto. Take an extra piece of yarn, or some embroidery thread and sew your button into place.


After that you can now try it on and just wiggle the button through the yarn.

Take your feathers, I used two and slide them down into your yarn and grab another button and sew it on top of your feathers.


I kinda went under the button to secure my feathers more. Trim the bottoms of your feathers and enjoy your headband!!!


----------------------------------------------------------

Thank you so much Amber for that tutorial! This is a perfect autumn accesory!

Amber has offered you all the chance to win one of her cute knitted headbands in your choice of either mustard yellow or gray.


Here's how to enter:

*EDIT* New rules for the mandatory entry. Sorry about that! Those that have entered already will still be counted.
-To enter you must go over to Amber's blog & leave a nice comment on any of her posts. Come back here & tell me something you love about her blog.
-For extra entries you can blog or tweet it. Just leave a separate comment with the link(s).
-Contest ends September 14!

Good Luck!!